Stuff2

Stuff

Stuff 1

Stuff

Friday, October 17, 2008

Sake-cream Poached Salmon

So here we have a recipe that I originally posted on GAX Online - a social network for gamers. It's fairly simple and easy to execute on a single person scale, which some days is perfect because I'm one of those people who hates to cook just for myself. Sometimes you just end up with too many leftovers to deal with. Or, depending on the recipe, you just end up looking at what you've made wondering what the hell made you think you'd need anything with a pound of ground beef in it.

Luckily for me, I have a boss that lets me play around with the food a little bit at work. And, one of the duties for kitchen staff is to prepare daily meals for everyone. It's a pretty good deal for the staff. Depending on what you get, you get a $20 to $40 meal free every day.

One of the ladies that works there has a sensitive stomach and almost always asks me for fish. So much so that it's gotten to the point that I'm just trying to find new ways to make fish for her that don't involve frying it. (Like all good Southern restaurants, we serve fried catfish.) And this week I decided on poached salmon for her. The catch... You have to have some sake around....

To make one serving you will need:

  • 1 Six to seven ounce salmon filet (with skin)
  • Sake (about a half a cup to start)
  • Heavy Whipping Cream
  • Chopped Onion (about 1 half of a small one)
  • Chopped Garlic
  • Quartered Shitake Mushroom Caps (about a half a cup)
  • Fresh Chopped Oregano
  • Fresh Chopped Rosemary
  • Salt & Pepper
  • One serving cooked wild rice

First you will want to start by saute'ing the chopped onion and the mushroom caps in oil over medium high heat until they are soft. Then add the garlic and continue saute'ing a few minutes more being careful not to let the garlic burn.

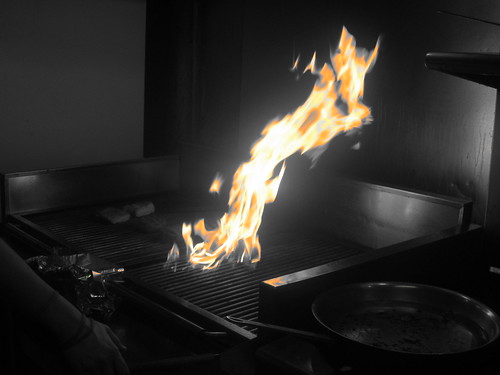
Next you will need to deglaze the pan with the sake. Just pour some in and stir it around, being sure to loosen anything that might have stuck to the bottom. Continue to cook until most of the sake cooks down. (For those of you who aren't experienced at cooking with alcohol -especially on gas ranges - you may want to consider turning the burner off for this part as just pouring this in will likely cause the flame to flare up if any splashes.)

Once the sake has cooked down, turn down the heat add the whipping cream. You'll need to add enough to the pan that it will almost cover the fish when you put it in. At this point, you may also add your herbs and season with salt and pepper.

Let the mixture cook another minute or two to combine flavors and then add your salmon skin side up. Now, once you get the salmon in there, you may notice that there's not quite enough liquid. That's okay. Just add more sake.

Now, you just need to let the salmon cook. Since the dish has a dairy product in it, you're going to want to keep the heat low so as not to burn it. Not a problem. For several reasons.

One, salmon is a fish you can cook and serve at different temperatures. Medium rare is generally preferred.

Two, it honestly won't take the salmon that long to cook.

And three, you can help facilitate the process by covering the dish with a lid.

Depending on the thickness of your fish, you'll want to start checking it in five minutes. Just remove the lid and feel the skin with the tip of your finger. If the skin isn't warm, it's not done. Give it a few more minutes and check again.

Once the salmon is cooked, remove it from the sauce and pour the sauce over the cooked rice you should already have prepared. Place the fish on the bed of rice, skin side down. And... If you're cooking for others and want to add some flare, sprinkle some whole fresh rosemary or oregano on the top.

A little note here... I know I didn't put any amounts on some of the items. That's okay. You don't need me to tell you how much of an item would have to be put in a dish to taste good to you. If you're unsure of a flavor, just start by adding a little an add more as you go along. With herbs in sauces, you can always add more toward the end without hurting the dish.

Also.. If you don't like an item in the dish. Don't be afraid to switch things up and put something to your liking in instead.

Anyway you go... If you try this and like it, let me know. If you tried it and changed something... Let me know that too

Italian Chicken Rolls


Here we have another recipe written for Amish Otaku. This one is pretty popular with my roommate and with the exception of pounding out the chicken breasts (which gets much easier with practice) is extremely easy to make.


For this dish, you’ll need the following things:

  • Chicken breasts
  • Sliced pepperoni
  • Grated mozzarella cheese
  • Minced garlic (this can be bought in jars already minced for you and will last a long time)
  • Dried basil, oregano and parsley
  • Salt and pepper
  • Butter

The first thing you’re going to need to do is to pound out your chicken breasts, smooth side down. You’ll want to get the breasts as thin as possible without tearing them, and somewhat rectangular.

For those of you who don’t have meat mallets at home, you can use a heavy cup or glass. (I used a heavy plastic drinking glass.)

Once this is done, season the breasts with salt and pepper and sprinkle on the herbs and garlic. Next, lay a line of pepperoni across one side of the breast, followed by a line of the mozzarella. Then, starting on the edge with the pepperoni, roll the chicken breast up so that the pepperoni and cheese are inside.

If at this point you find the breasts won’t stay rolled on their own - they sometimes will - simply use toothpicks to hold them in place.

Season the outside with salt, pepper and the same herbs - minus the garlic. Then, in a skillet on medium to medium-high heat, brown the outside of the roll in a little butter on all sides.

Once they’re browned, place them on a cookie sheet covered in tinfoil and put them in the oven at 400°F for 10 minutes. (I used a toaster oven.)

Just a note here for you all to remember that different ovens cook differently depending on whether they’re gas, electric, how old they are, etc. So before eating these, it would be a good idea to temp them and make sure that they are at 160°F.

Once you’re sure about the temp, plate and consume.

Quicky Salmon Cakes with a Honey Mustard Sauce

So for my first couple of posts, I'll be pulling some over from other sites that I've written for or posted on. This first post was orignially done as a feature on Amish Otaku, a site for gamers, comic book and movie fans and other general geekery.

It's a simple, tasty recipe for salmon cakes designed for the novice cook.

First, you’ll need the following tasty, tasty items:

  • 4 slices wheat bread
  • 2 large eggs
  • 1/2 small chopped onion
  • Seasoning (this can be your favorite mixed seasoning; I tend to go for Greek)
  • Olive oil
  • Flavorless oil (vegetable, corn or peanut oil is good)

You’ll also need the following hardware:

  • Another, smaller non-stick pan
  • A plastic spatula
  • A plate with some folded paper towel on it
  • A good chef’s knife
  • A mixing bowl
  • A cutting board

This first recipe is something I like to do every now and again for myself. It’s fairly simple to make. The only real labor other than mixing the ingredients together is chopping up some onion and tearing up some bread. Granted, it takes a little more time than throwing that Hot Pocket in the nuke, but it’s tastier and is better for you. So, what are you waiting for? Set that controller down, walk away from the keyboard, head to the kitchen and let’s start cooking.

Okay. To get going, we start by putting the skillet on the stove and filling it a third of an inch high with the oil. I know a lot of people’s instincts might lead them to turn the burner on high. Do not do this. Set the burner to medium-low.

The reason for this is that if the oil is cooking at high when you put the patties in, they’ll brown on the outside way before the middle gets hot. In the end, all you’d be left with is crispy goo. What you want is for the patties to take as long to brown as they do to heat. Then you’re looking at yum. Yes, I said that intentionally.

Next we’ll need to chop the onion. Now, a lot of people have difficulty with this for several reasons. One, onions make some people cry; two, those layers are hard to control. Well, there are solutions to both of these problems.
Onion cutting
Quin Bowers

First, let’s deal with the crying issue. If you’re one of the people who has this problem, all you have to do is lay your cutting board across the sink and run water over it. Once you have the peel off the onion, you can keep it under the running water and that will fend off the crying fits.

Second, how to keep the onion under control while you cut. Well, let’s look at the way to cut the onion. First, chop off the end of the onion that doesn’t have the hair-like root still attached to it – you’ll want this part left to help keep the layers together –so it has a flat bottom. Next, set the onion on its end and cut it in half starting in the middle of the root area.

Once this is done, set the other half of the onion aside and peel the outer layers off the half you’re working with, continuing to keep the root in place. Cut the onion half through the middle from bottom to top, stopping before you reach the root and then lay it on its flat side.

Here, you simply cut strips into it from the root end down. (Remember to leave the root in place still.) Once this is done, you should have a bunch of onion strips, otherwise known as julienned, held together by the root end. From here all you have to do is turn the onion 90 degrees and cut the strips into small squares. (Remember to keep your fingers out of the way during all this cutting. You’re not going to be able to comment on the latest Digg article if you lose your digits in the process.) Viola! Chopped onion.

Now just sauté the onion in the smaller pan with some olive oil until they become translucent and take them from the pan to the plate with the paper towel on it to drain off the excess oil.

While you’re sautéing and draining the onion, take the four pieces of bread and tear them into small chunks, throwing them into the mixing bowl. Also, open the cans of salmon and drain them before dumping them into the bowl as well. Go ahead and add the onions now, too, if they’ve drained enough.


At this point, you will want to add some seasoning to your mix. I know a lot of recipes tell the person using them exactly how much of the seasoning to put in, but I’m not going to. The truth is, I never measure what I put into what I’m cooking unless I know for a fact it will kill the end product if I don’t. Just put in the amount that tastes good to you. Remember to not be afraid to taste your food while cooking.

I will say, however, that now is the best time to add the seasoning because, if you’re like most people, you’re not going to want to test-taste until it’s cooked once you add the eggs, which you will do… now.

Okay kids, now it’s time to get messy. Take your hands and mix everything together, squishing the eggs into the rest of the mixtures as you go. Once you’ve finished this, don’t worry about washing your hands yet. You still need to shape the mix into patties. This is really easy: Just quarter the mixture off and round/pat the quarters out into patty shapes. You should be able to get four decent-sized patties out of the mixture unless you’re like me and gave part of your fish to your cats before beginning the process. (You can wash your hands now if you like.)

Now, simply take these patties and, using your spatula, gently place them in the oil. Don’t let them touch. They’ll take longer if you crowd them.


And, just let them cook. Check to see how the bottoms are browning; when they’re a nice golden brown, simply flip them over – gently again – and let the other side cook. Remember, the oil needs to be medium/low. If the patties seem to be browning too quickly, turn the burner down. If they still cook too fast, put them on a pan and slide them into an oven or toaster oven at 350 degrees for about five minutes to finish off. Do not nuke them; it will only make them soggy.

Don’t worry if the oil heat is an issue the first time around. Every stove is different and cooking with oil takes a little practice. But once you get it down, there will be an unlimited number of things you can make!

Once the patties have finished cooking, set them to the side on the plate with a paper towel on it. Let them drain for a few minutes before serving.

In the meantime, just prep your plate. Grab some dipping sauces, garnishes, whatever you like. I actually serve mine with a honey mustard mixture. Basically I take two parts honey mustard and mix it with one part sour cream. Extremely tasty.

Well… There you have it. Amish Otaku’s first cooking how-to. I hope you enjoyed reading it and hope you enjoy making the dish. But, before I go, I want to encourage you elite geeks to experiment with your dishes. For instance, to add some extra flavor to this dish, I’ve been known to add fresh chiffon cut basil (or basil leaves cut into strips) into the mixture. It gives the patties a little something extra.

So go ahead, give these things a whirl and let me know what you think.

Thursday, October 16, 2008

Out of the Pan and into the Fire

Before we get rolling here at the Kitchen Diaries, I thought I'd lay down a simple fact. I never had aspirations to cook for a living. Being raised on the living a waitress could provide, I despised the idea of working in anything resembling food service.

Nor did previous jobs as a dishwasher/grunt at truck stops and mom 'n pop eateries as a kid engender me to the food service industry.

And honestly, I seriously doubt that it occurred to anyone in my family that restaurant work was something someone would aspire to. That's just something you do to get through college and become something more important, like a doctor. Right?

Yet, somehow, at the age of 32 I find myself standing behind a restaurant stove around fifty hours a week and despite it being an exhausting experience that even takes up some of my time outside the restaurant (and despite all my grumblings and complaints during a service shift) I find I really enjoy my work.

It's tiring, it's sweaty, I often come close to slicing my fingers off or burning the hell out of myself once a week or so and the customers can be real pains in the ass; but I realize why I love it when I nail that new recipe or complete a non-stop, fast paced service successfully.

While I'm getting stuff out of the way. Let me be truthful about something else. I'm not a culinary school graduate. I haven't spent twenty years in the biz. I've worked about six years total in restaurants. Two of those were as a dishwasher and two others were in establishments ran by my family.

Only the last two have been in fine dining or even as a chef.

Luckily for me. I've managed to work the last few years for chefs that are willing to teach. (My current boss is even opposed to culinary school, believing that it's silly to pay to learn when you can get paid.)

All this said, I know there's still a lot for me to learn. I don't have the answers to everything food related and don't want anyone to get the impression that I think I do.

What I do know, I'll share. What I don't know, I'll look up.

My real goal here is to share what I love with others and perhaps encourage them to love it as well.

Chocolate Oblivion Cake Sea Bass on a Bed of Polenta w/ rustic tomato sauce Filet topped with roasted Garlic butter and a grilled prawn Check out that Grill pesto crusted tuna tuna in white bean bisque pitsburgh 1 cutting halibut

========

© QuintLyn Bowers 2008-2011
Twitter Delicious Facebook Digg Stumbleupon Favorites More